このページではAndroid Studioのインストール手順と、Android Studio上でお試しでKotlinプログラミングを行う手順について説明していきます。
下記記事ではTry KotlinでKotlinプログラミングを行う方法とコンパイラを導入してコマンドライン上でプログラミングする方法を説明していますので興味がありましたら合わせて読んでみてください。

Contents
Android Studioインストール
まずAndroid StudioをAndroid Developersのページから入手しましょう。

私がダウンロードした時のバージョンの最新は3.2.1でした。「DOWNLOAD ANDROID STUDIO」をクリックすると利用規約の同意画面に移動しますので、規約を読んで問題なければ同意ボタンを押しましょう。インストーラのダウンロードが始まります。約1GBのダウンロードが行われますので時間がかかります・・・。
ダウンロードが完了したらインストーラを実行しましょう。
下記のような画面が出ますのでアプリケーションフォルダにAndoroid Studioをコピーします。
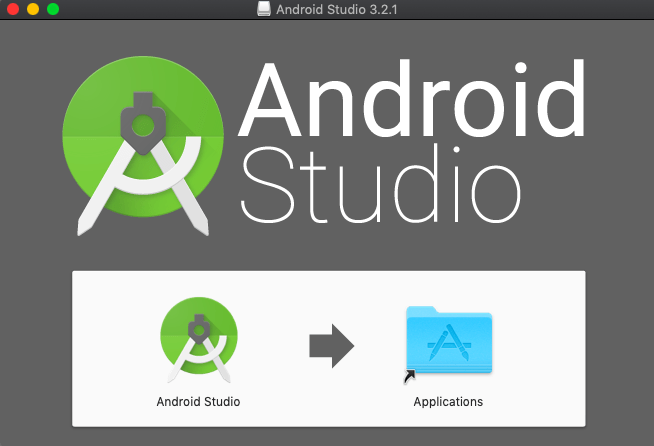
これでインストールは完了です。
アプリケーションフォルダ等からAndroid Studioを起動しましょう。
Android Studio起動
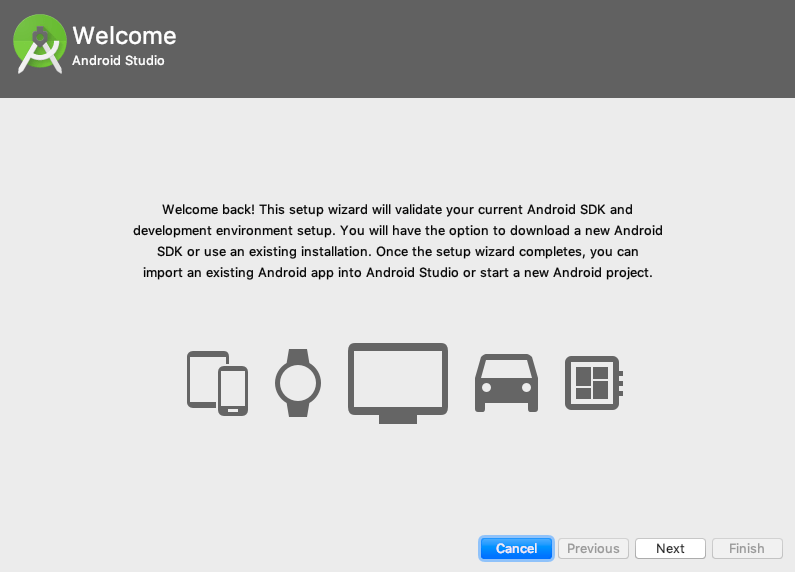
Android Studioを起動すると下記のような画面が表示されると思います。Nextボタンを押して次に進みましょう。
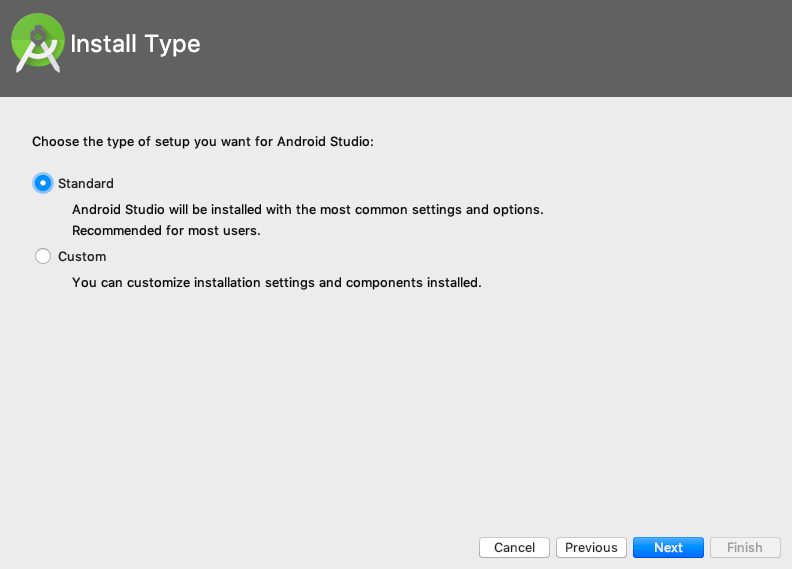
次はインストールタイプの選択です。最初はStandardを選択するので良いと思います。選択肢してNextボタンを押しましょう。
次は見た目の選択です。これは好みですね。私はDarculaを選択しました。なんとなく目に優しそうなのでw

続いてはここまでの設定の確認です。問題なければFinishボタンを押しましょう。
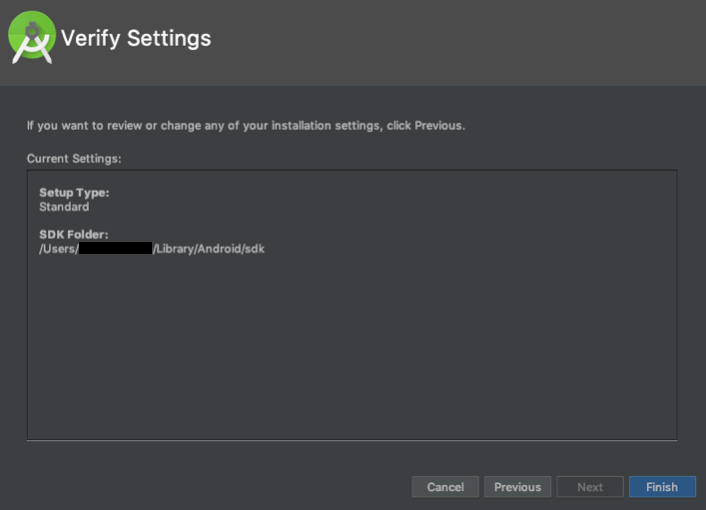
もしSDK等が最新でない場合はここで最新版のダウンロードが行われます。私はここでは特にダウンロードはありませんでした。
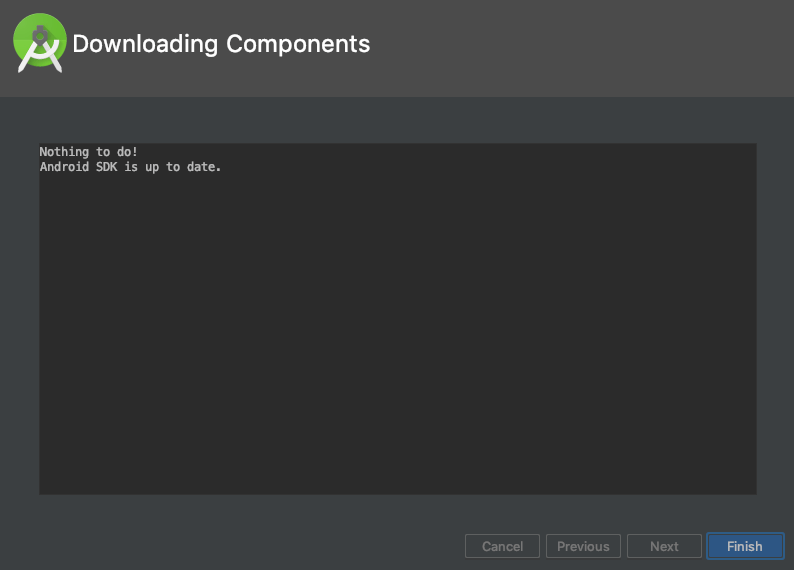
Android Stduioは使用していて足りないSDKやファイルがあれば随時Web上から自動でダウンロードしてインストールしてくれますので大変親切です。Android Studioからインストールを薦められたらインストールする方が無難です。ただしWebにアクセスできる環境でないとダウンロードができなくて開発を始められないようなこともありうるので注意が必要です。
ここまででAndroid Studioの初期設定は完了です。
スポンサーリンク
Android Studioプロジェクト作成
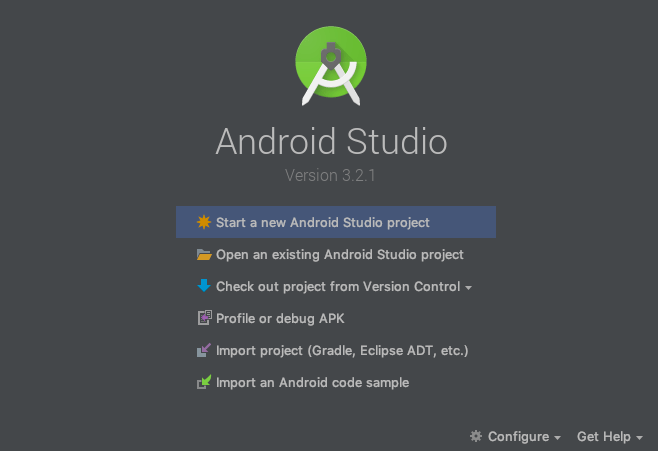
続いて次のような画面が表示されると思います。「Start a new Android Studio project」をクリックして早速Android Studioプロジェクトを作成していきましょう。
次は作成するAndorid Studioプロジェクトの設定を行なっていきます。まずは下記の画面でApplication name、Company domain、Project location等の設定を行います。
Company domainは特に自分のものが無ければなんでも良いです。Project locationはそのプロジェクトの実体ファイルが作成される場所になりますので、好きな場所を選択しましょう。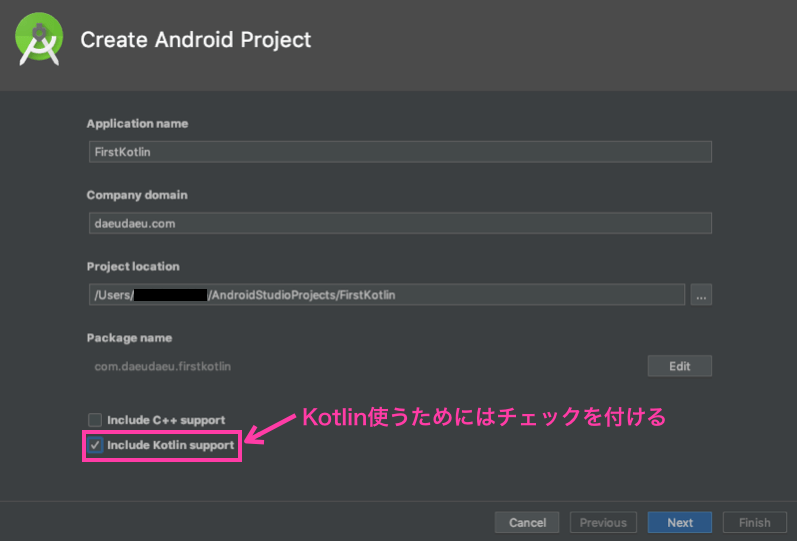
ここでポイントが1つあります。それはKotlinを使用する際は「include Kotlin support」にチェックを付ける必要があるということです。Android Studioの3.0以降から正式にKotlinがサポートされ、このチェックを付けるだけでAndroid Studioで簡単にKotlinプログラミングを行うことができるようになっています。それ以前のバージョンのAndroid Studioでは別途プラグインのインストールが必要でした。
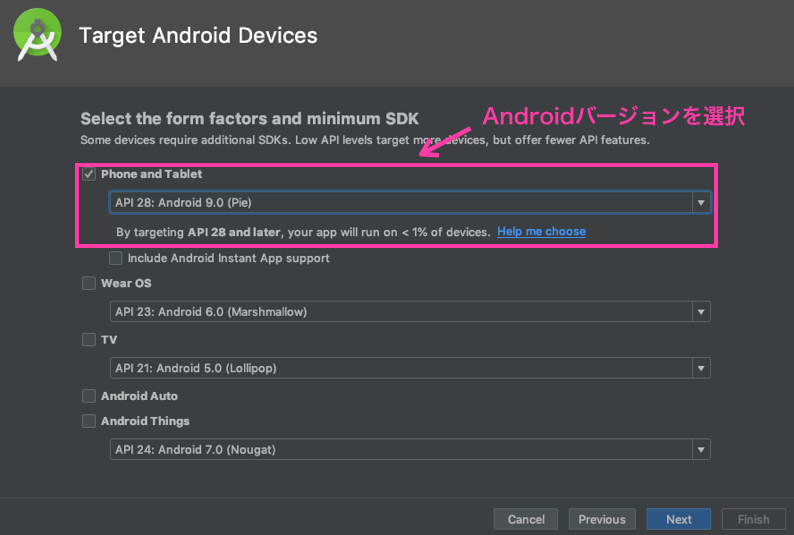
続いての画面では作成するAndroidアプリを動作させるデバイスとAndoid OSのバージョンを選択します。ここではスマートフォンで動作させることを想定して「Phone and Tablet」にチェックをつけ、Andorid OSのバージョンには現時点で最新のAndroid 9.0 (Pie)を選択してNextボタンを押しましょう。
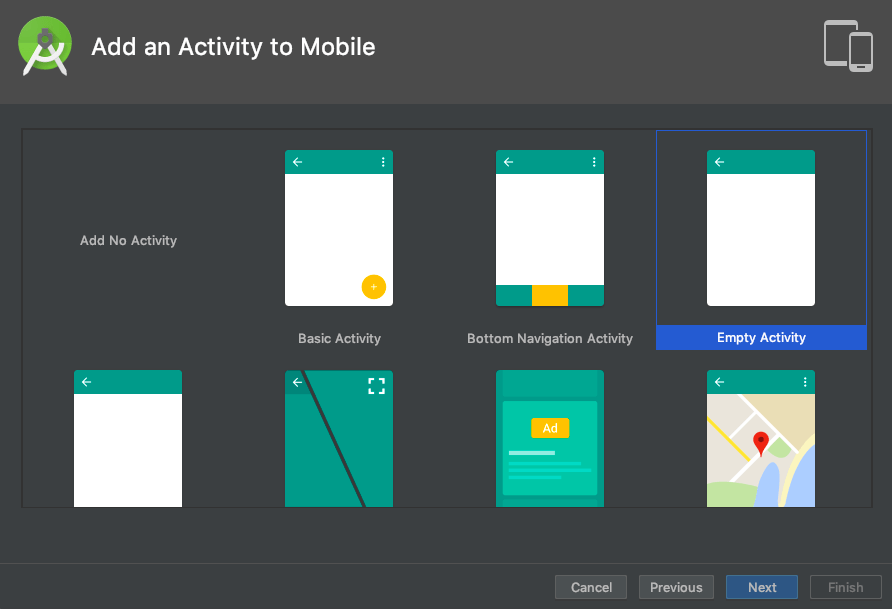
続いてActivityを選択します。ActivityとはAndroidアプリの基本画面構成みたいなものです。ここでは「Empty Activity」を選択し、この状態でNextボタンを押しましょう。
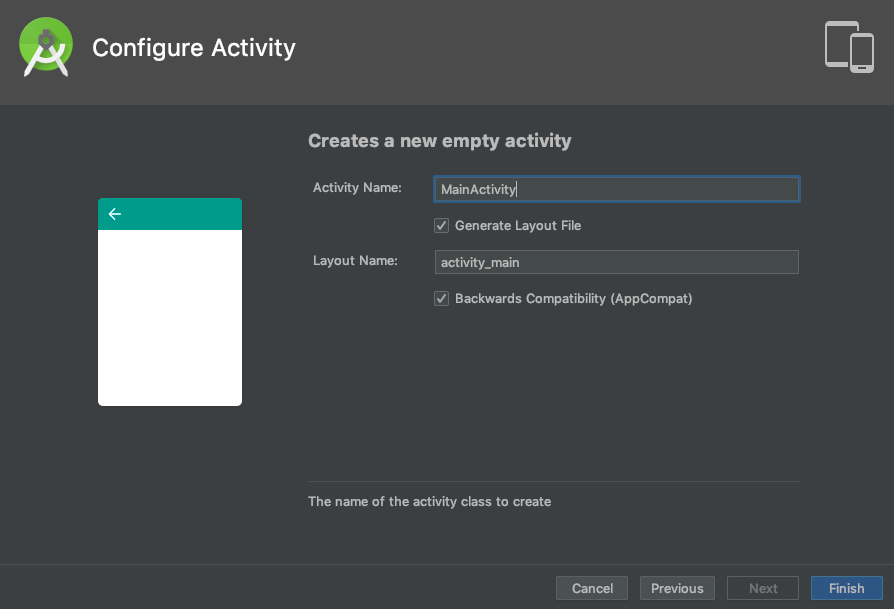
最後の設定はActivityの設定です。ここではそのままの状態でFinishボタンを押してプロジェクト作成を実行しましょう。
プロジェクト作成が完了すると次のような構成の画面が表示されると思います。Android Studioのメインの画面は3つです。
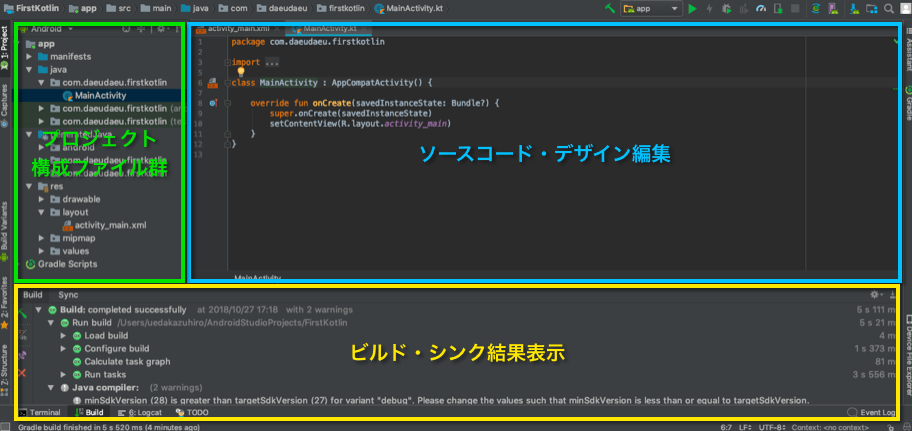
1つ目は青色で示したソースコード・デザイン編集画面です。この画面上で実際にソースコードを書いたりアプリのデザインを編集したりします。
2つ目は緑色で示したプロジェクト構成ファイル群画面で、ここから編集したいファイルを選択してファイルの内容を青色部分の画面に表示し、青色画面上でそのファイルの編集を行います。
例えば上の図では「java/[パッケージ名]/MainActivity」を選択した画面です。「res/layout/activity_main.xml」を選択すると下の図のようになります。
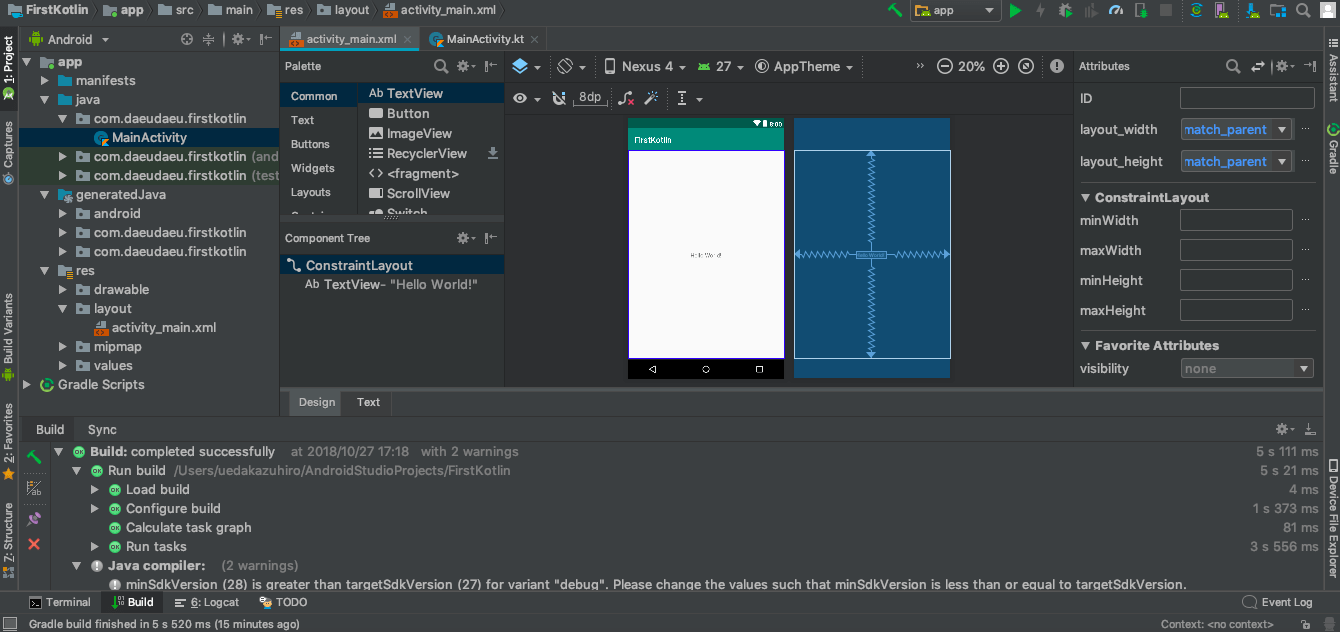
3つ目は黄色のビルド・シンク結果表示画面です。ビルドやシンクした結果が表示されます。
Androidアプリをシミュレータ上で実行
それではAndroidアプリ作成の第一歩としてシミュレータ上でアプリを動作させてみましょう。アプリといっても最初は単に画面に「Hello World」を表示するだけのアプリです。
AVD作成
まずシミュレータの準備を行います。行うのはAVDの作成です。AVDとは「Android Virtual Device」の略語であり、要は仮想端末のことです。Android Studioではこの仮想端末上で作成したアプリの動作をシミュレートすることができます。さらに、この仮想端末としては実際のAndroid端末用のものを用意することができます。
実際にAVDを作成していきましょう。まずは画面右上にあるツールバーからAVD Managerをクリックして起動します。

まだAVDを1つも用意していない場合は下記のような画面が表示されます。「+Create Virtual Device..」をクリックしてAVD(仮想端末)を作成していきましょう。

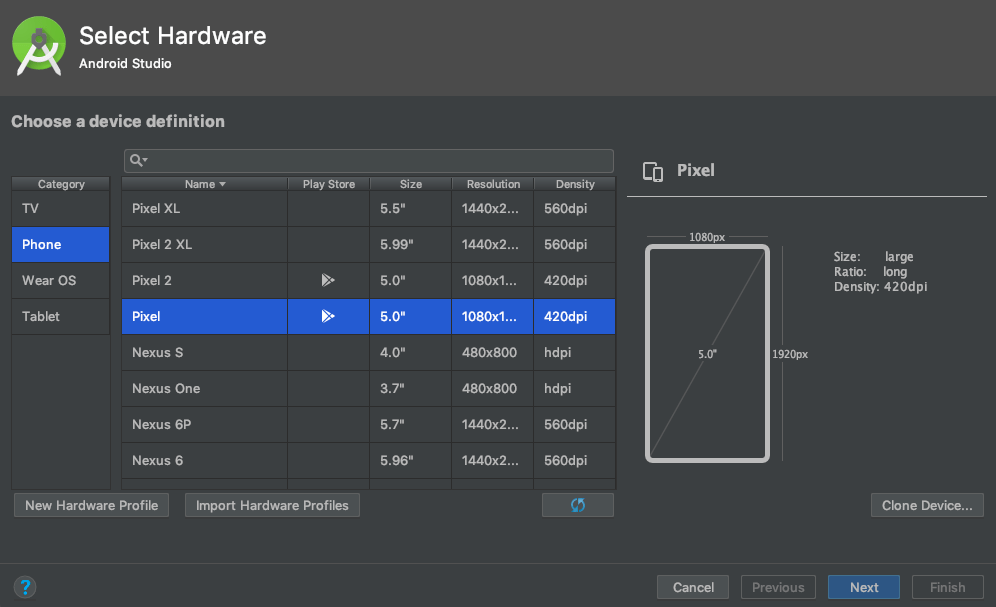
続いてどの端末の仮想端末を作成するかを選択します。ここではPixelを選択します。
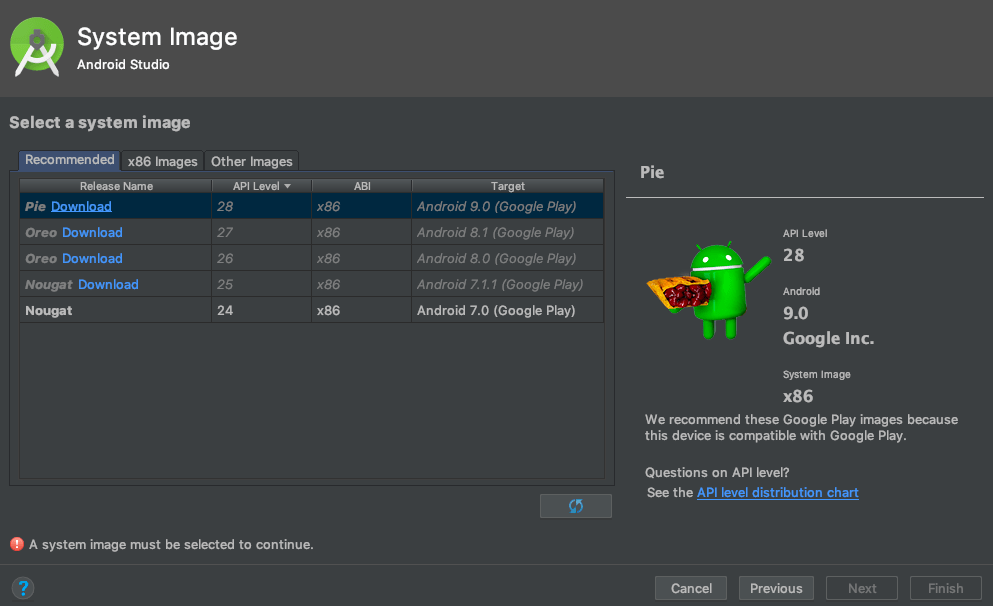
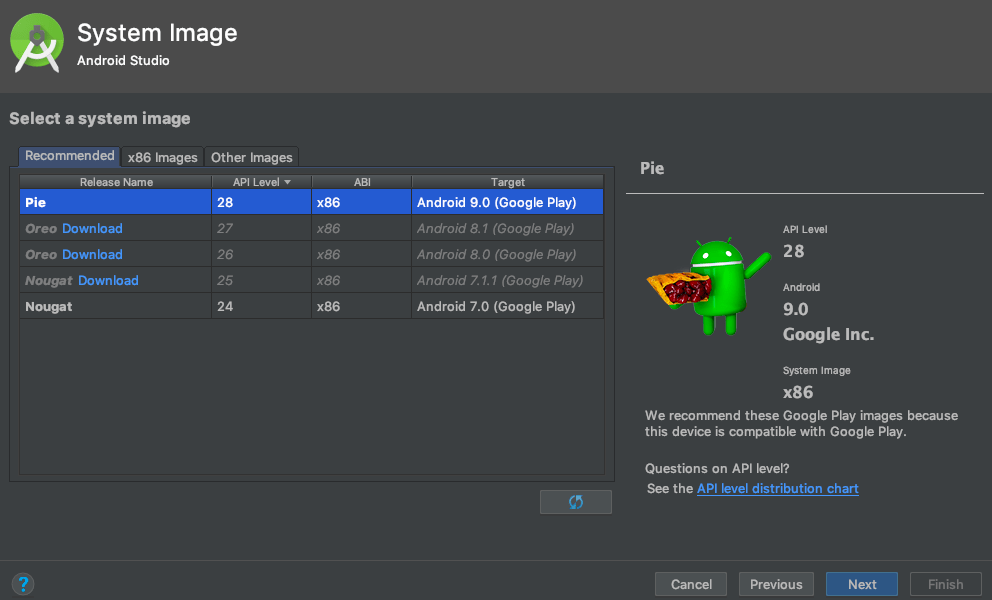
次はOSの選択です。Pie(Android 9.0)を選択したいところですが、このPieの行はグレーアウトされており、選択してもNextボタンを押すことができません。これはこのOSを仮想端末として動作させるための構成が足りていないためです。これらをダウンロードするために「Download」をクリックします。
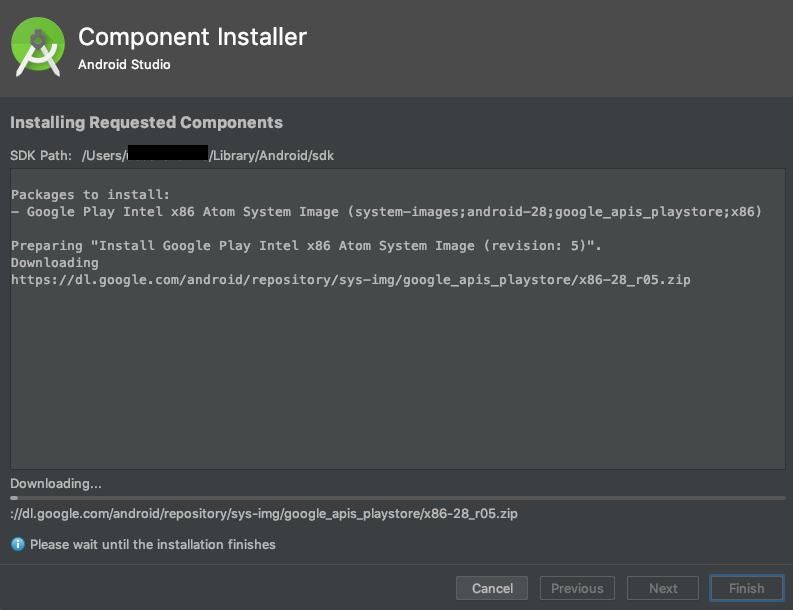
すると下記のような画面が表示されてダウンロードが始まります。ダウンロードが完了するまでしばらく待ちましょう。完了したらFinishボタンを押します。
これによりPieの行のグレーアウトが解除され、選択してNextボタンを押すことができるようになっています。Nextボタンを押して次に進みましょう。
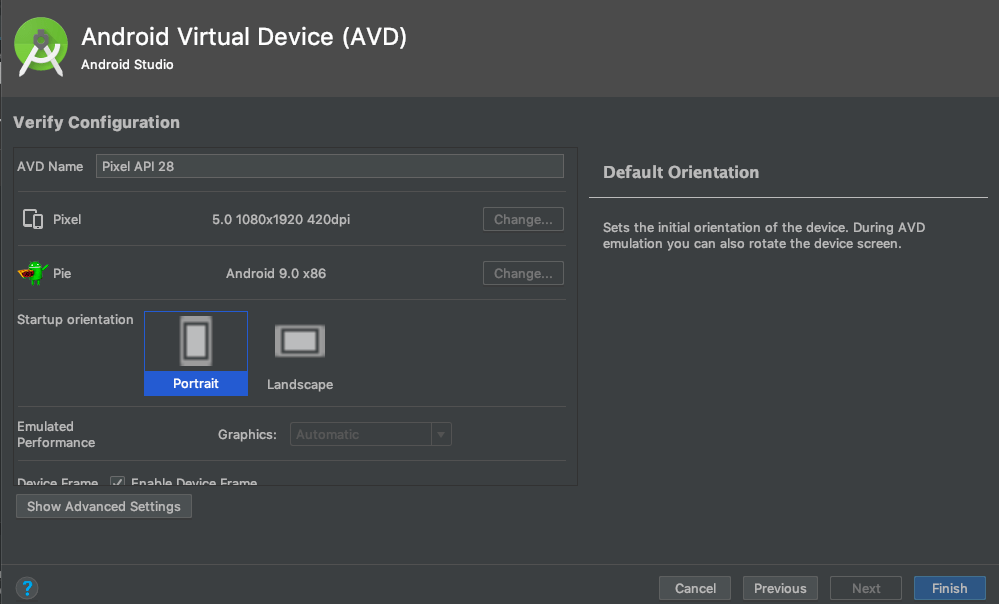
最後に仮想端末の設定を行います。例えば画面を横長画面にしたければその設定をここで行うことが可能です。ここでは何も設定せずFinishボタンを押します。
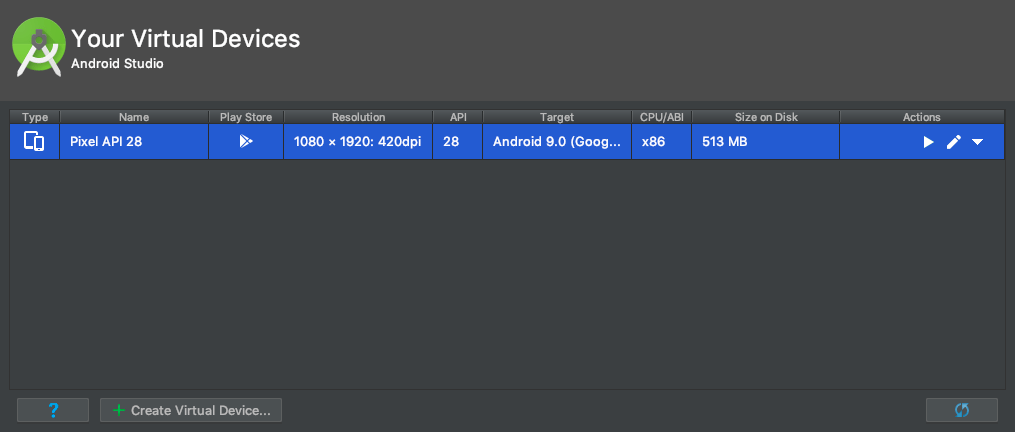
すると下画面に移動します。自分が作成した仮想端末が表示されていることを確認してください。さらに仮想端末を追加したい場合は「+Create Virtual Device…」をクリックすれば追加可能です。
スポンサーリンク
アプリを仮想端末上で実行
仮想端末を準備できればアプリを仮想端末上で実行することが可能です。
現状プログラミングは全く行っていませんが、それでもアプリとして起動させることは可能です。
Android Studioプロジェクトを作成した時点で、下記のような状態になっていると思います。
・java/[パッケージ名]/MainActivity
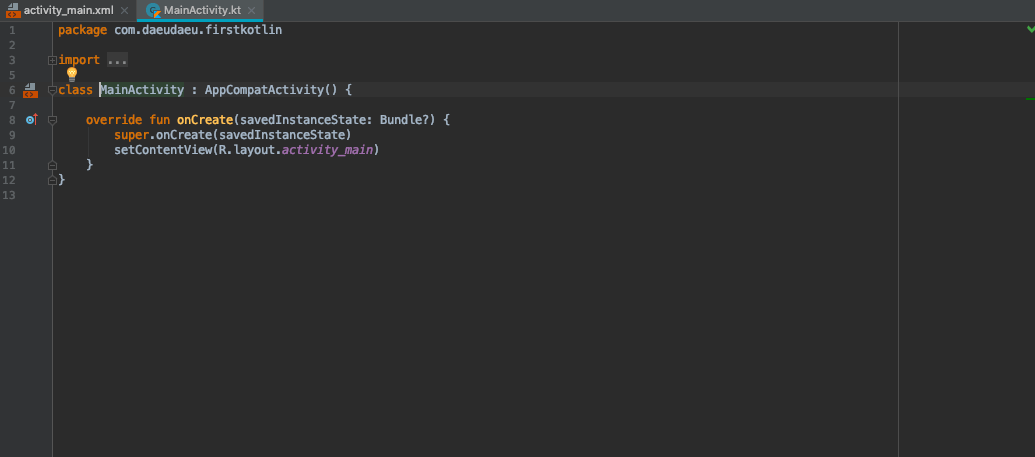
・res/layout/activity_main.xml
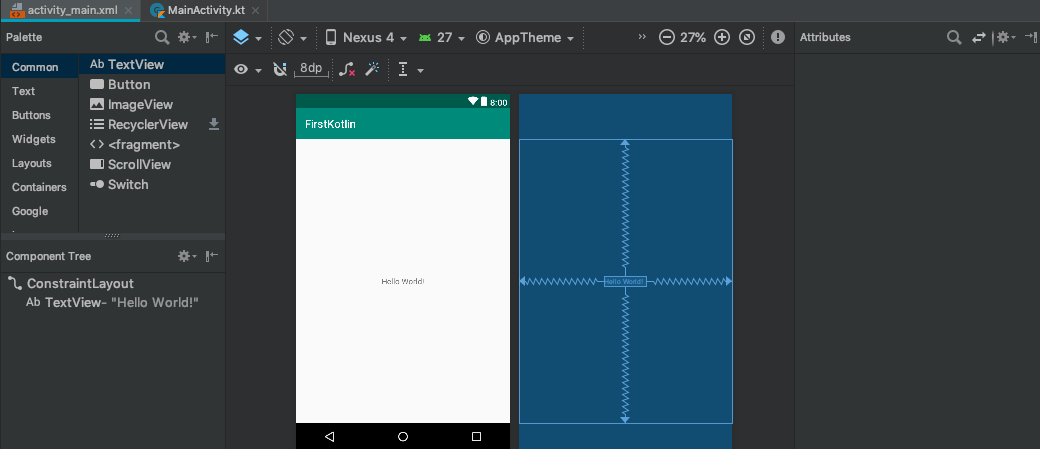
分かりにくいですが、activity_main.xml のデザイン画面ではアプリの中央部分には”Hello World!”と記載されています。
つまり、このプロジェクトではプログラミングを行っていないので特に動作はしないですが、画面中央に”Hello World!”と表示されるアプリしたことになります。
このアプリを仮想端末で起動してみましょう。画面右上のツールバーからRunボタンを押して作成中のアプリを動作確認します。RunボタンはBuildなど実行中だと押せないので注意してください。

Runボタンを押すと仮想端末の選択画面に映ります。先ほど作成した仮想端末を選択してOKボタンを押します。

すると下記のような画面が立ち上がり、仮想端末が起動を始めます。本物みたいで本格的ですね。
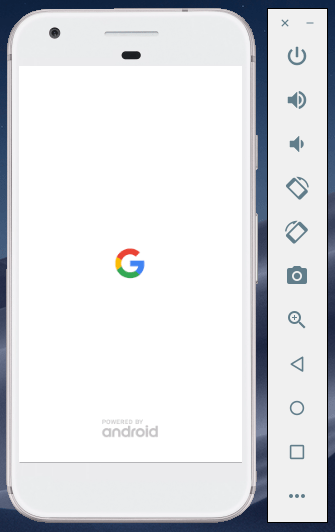
起動してしばらくすると作成中のアプリが起動するはずです。
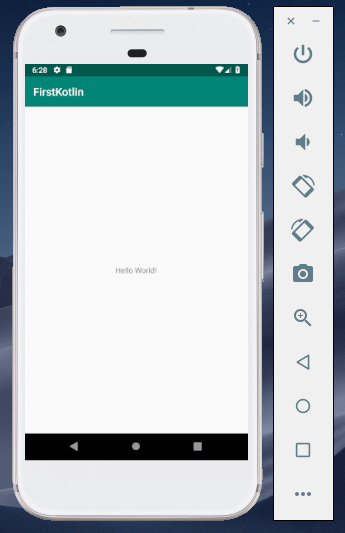
分かりにくいですが画面中央に”Hello World!”と表示されており、作成中のアプリが起動したことを確認できると思います。右上の×ボタンを押すとアプリの実行を終了することができます。
私が初めてアプリを起動しようとした時はアプリ起動に失敗しました
途中でAndroid Studioからファイルのインストールを促されたのですが、そのインストールが完了していなかったために失敗した可能性があります
同じように、もしアプリ起動できなかった・途中でインストールを促された方はインストール後に再度Runボタンを押してみてください
今度はもう少しアプリっぽいアプリを作成してみましょう!
電卓アプリ作成
ここではAndrodi StudioとKotlinを用いて電卓アプリを作成していきたいと思います。 Android Studio & Kotlin 両方とも初心者なので不安ですが、まずはお試しでプログラミングしてみました。
まず「res/layout/activity_main.xml」のTextタブを開きます。
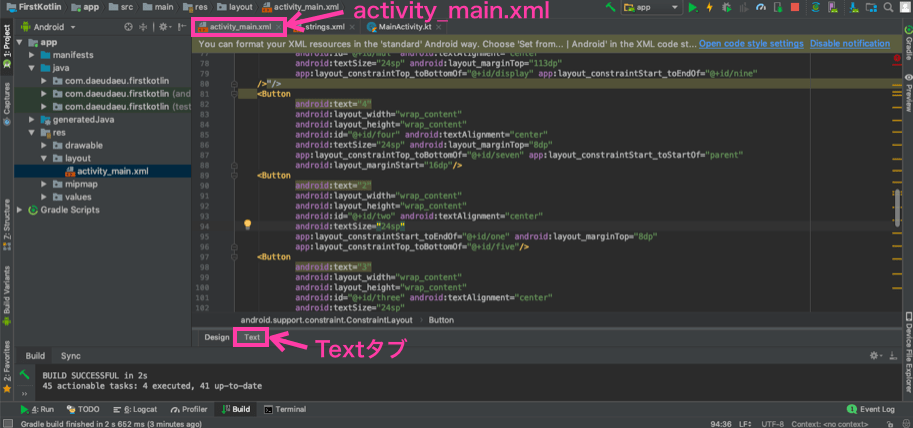
このファイルはアプリのUI画面のオブジェクトや設定を行うファイルになります。
このファイルを下記のように変更します。
・activity_main.xml
<?xml version="1.0" encoding="utf-8"?>
<android.support.constraint.ConstraintLayout
        xmlns:android="http://schemas.android.com/apk/res/android"
        xmlns:tools="http://schemas.android.com/tools"
        xmlns:app="http://schemas.android.com/apk/res-auto"
        android:layout_width="match_parent"
        android:layout_height="match_parent"
        tools:context=".MainActivity" android:minWidth="0dp" android:maxWidth="800dp" android:maxHeight="1200dp"
        android:minHeight="0dp">

    <TextView
            android:layout_width="365dp"
            android:layout_height="80dp"
            android:text="0"
            app:layout_constraintLeft_toLeftOf="parent"
            app:layout_constraintTop_toTopOf="parent"
            android:id="@+id/display" android:textSize="60sp" android:layout_marginTop="68dp"
            android:layout_marginLeft="8dp" android:textAlignment="viewEnd"/>
    <Button
            android:text="Clear"
            android:layout_width="wrap_content"
            android:layout_height="wrap_content"
            android:id="@+id/clear" android:textAlignment="center" android:textSize="18sp"
            app:layout_constraintStart_toStartOf="parent"
            android:layout_marginStart="16dp" android:layout_marginTop="50dp"
            app:layout_constraintTop_toBottomOf="@+id/display"/>
    <Button
            android:text="8"
            android:layout_width="wrap_content"
            android:layout_height="wrap_content"
            android:id="@+id/eight" android:textAlignment="center"
            android:textSize="24sp"
            android:layout_marginTop="113dp" app:layout_constraintTop_toBottomOf="@+id/display"
            app:layout_constraintStart_toEndOf="@+id/seven"/>
    <Button
            android:text="9"
            android:layout_width="wrap_content"
            android:layout_height="wrap_content"
            android:id="@+id/nine" android:textAlignment="center"
            android:textSize="24sp" android:layout_marginTop="113dp"
            app:layout_constraintTop_toBottomOf="@+id/display" app:layout_constraintStart_toEndOf="@+id/eight"/>
    <Button
            android:text="÷"
            android:layout_width="wrap_content"
            android:layout_height="wrap_content"
            android:id="@+id/div" android:textAlignment="center"
            android:textSize="24sp" android:layout_marginTop="50dp"
            app:layout_constraintTop_toBottomOf="@+id/display"
            app:layout_constraintStart_toEndOf="@+id/clear" android:layout_marginStart="176dp"/>
    <Button
            android:text="7"
            android:layout_width="wrap_content"
            android:layout_height="wrap_content"
            android:id="@+id/seven" android:textAlignment="center"
            android:textSize="24sp"
            app:layout_constraintEnd_toStartOf="@+id/eight" android:layout_marginTop="16dp"
            app:layout_constraintTop_toBottomOf="@+id/clear" app:layout_constraintStart_toStartOf="parent"
            android:layout_marginStart="16dp" app:layout_constraintHorizontal_chainStyle="spread_inside"/>
    <Button
            android:text="5"
            android:layout_width="wrap_content"
            android:layout_height="wrap_content"
            android:id="@+id/five" android:textAlignment="center"
            android:textSize="24sp" app:layout_constraintStart_toEndOf="@+id/four"
            android:layout_marginTop="8dp" app:layout_constraintTop_toBottomOf="@+id/eight"/>
    <Button
            android:text="6"
            android:layout_width="wrap_content"
            android:layout_height="wrap_content"
            android:id="@+id/six" android:textAlignment="center"
            android:textSize="24sp" android:layout_marginTop="8dp"
            app:layout_constraintTop_toBottomOf="@+id/nine" app:layout_constraintStart_toEndOf="@+id/five"/>
    <Button
            android:text="×"
            android:layout_width="wrap_content"
            android:layout_height="wrap_content"
            android:id="@+id/mul" android:textAlignment="center"
            android:textSize="24sp" android:layout_marginTop="113dp"
            app:layout_constraintTop_toBottomOf="@+id/display" app:layout_constraintStart_toEndOf="@+id/nine"
    />"/>
    <Button
            android:text="4"
            android:layout_width="wrap_content"
            android:layout_height="wrap_content"
            android:id="@+id/four" android:textAlignment="center"
            android:textSize="24sp" android:layout_marginTop="8dp"
            app:layout_constraintTop_toBottomOf="@+id/seven" app:layout_constraintStart_toStartOf="parent"
            android:layout_marginStart="16dp"/>
    <Button
            android:text="2"
            android:layout_width="wrap_content"
            android:layout_height="wrap_content"
            android:id="@+id/two" android:textAlignment="center"
            android:textSize="24sp"
            app:layout_constraintStart_toEndOf="@+id/one" android:layout_marginTop="8dp"
            app:layout_constraintTop_toBottomOf="@+id/five"/>
    <Button
            android:text="3"
            android:layout_width="wrap_content"
            android:layout_height="wrap_content"
            android:id="@+id/three" android:textAlignment="center"
            android:textSize="24sp"
            app:layout_constraintStart_toEndOf="@+id/two" android:layout_marginTop="8dp"
            app:layout_constraintTop_toBottomOf="@+id/six"/>
    <Button
            android:text="-"
            android:layout_width="wrap_content"
            android:layout_height="wrap_content"
            android:id="@+id/sub"
            android:textSize="24sp"
            app:layout_constraintStart_toEndOf="@+id/six" android:layout_marginTop="8dp"
            app:layout_constraintTop_toBottomOf="@+id/mul"/>
    <Button
            android:text="1"
            android:layout_width="wrap_content"
            android:layout_height="wrap_content"
            android:id="@+id/one" android:textAlignment="center"
            android:textSize="24sp" app:layout_constraintStart_toStartOf="parent"
            android:layout_marginStart="16dp" android:layout_marginTop="8dp"
            app:layout_constraintTop_toBottomOf="@+id/four"/>
    <Button
            android:text="+"
            android:layout_width="wrap_content"
            android:layout_height="wrap_content"
            android:id="@+id/add" android:textAlignment="center"
            android:textSize="24sp"
            app:layout_constraintStart_toEndOf="@+id/three" android:layout_marginTop="8dp"
            app:layout_constraintTop_toBottomOf="@+id/sub"
    />
    <Button
            android:text="0"
            android:layout_width="wrap_content"
            android:layout_height="wrap_content"
            android:id="@+id/zero" android:textAlignment="center"
            android:textSize="24sp"
            app:layout_constraintStart_toStartOf="parent"
            android:layout_marginStart="16dp" android:layout_marginTop="8dp"
            app:layout_constraintTop_toBottomOf="@+id/one"/>
    <Button
            android:text="="
            android:layout_width="wrap_content"
            android:layout_height="wrap_content"
            android:id="@+id/equal" android:textAlignment="center"
            android:textSize="24sp"
            android:layout_marginTop="8dp" app:layout_constraintTop_toBottomOf="@+id/add"
            app:layout_constraintStart_toEndOf="@+id/zero" android:layout_marginStart="176dp"
    />

</android.support.constraint.ConstraintLayout>
変更後、今度はTextタブではなくDesignタブを選択すると下記のような画面になり、UI画面が.xmlファイルの編集により変わっていることが確認できると思います。
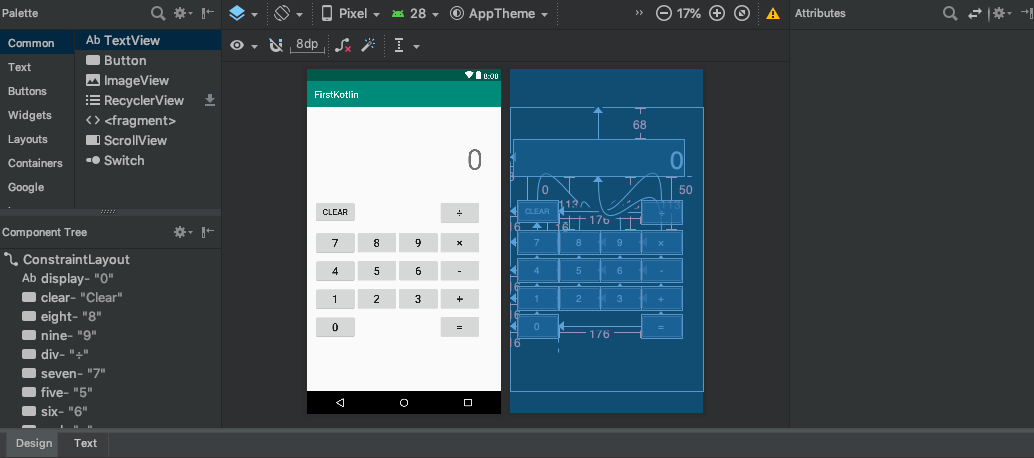
ここからも分かるように、UI画面の編集はText画面でXMLファイルを編集することでも可能ですし、Designタブでボタンなどのオブジェクトを画面上に貼り付けたり移動することで行うことも可能です。
上記のXMLファイルでは電卓に必要な数字ボタンや計算ボタンのレイアウトやID等の設定を行っています。
例えば下記では数字ボタン「3」の設定を行っています。IDとしては”three”を設定しています。このIDをプログラムに用いて、押された時にどういう処理を行うかなどのコーディングを行います。
    <Button
            android:text="3"
            android:layout_width="wrap_content"
            android:layout_height="wrap_content"
            android:id="@+id/three" android:textAlignment="center"
            android:textSize="24sp"
            app:layout_constraintStart_toEndOf="@+id/two" android:layout_marginTop="8dp"
            app:layout_constraintTop_toBottomOf="@+id/six"/>
続いて処理を行うプログラム部分を作成します。「java/[パッケージ名]/MainActivity.kt」を下記のように変更します(パッケージ名はプロジェクト作成時に設定したもの)。
・MainActivity.kt
package com.daeudaeu.firstkotlin
/* ここまでコピペだめ */

/* ここからコピペ */
import android.support.v7.app.AppCompatActivity
import android.os.Bundle
import android.widget.Button
import android.widget.TextView

class MainActivity : AppCompatActivity() {


    override fun onCreate(savedInstanceState: Bundle?) {
        super.onCreate(savedInstanceState)
        setContentView(R.layout.activity_main)

        /* 値を格納する変数 */
        var value : Int = 0

        /* 計算結果をクリアするかどうかを判断するためのフラグ */
        /* trueの時に数字ボタンが押された時に計算結果をクリアする */
        /*
            例えば"="押された時にフラグをtrueにし、
            その後数字ボタンが押された時などにクリアするために使う
        */
        var clear : Boolean = false

        /* 計算処理を行うかどうかを判断するためのフラグ */
        /* trueの時にのみ計算ボタンが押された時に計算処理を行う */
        /*
            例えば"+"押された後に、
            数字ボタンが押されないまま"-"が押された時等は
            計算は行いたくないのでこのフラグを利用して制御する
         */
        var calc : Boolean = false

        /* 演算子を記憶しておく変数 */
        /* nullの可能性あり */
        var operator : String? = null

        /* 数字ボタン */
        val buttonZero : Button = findViewById(R.id.zero)
        val buttonOne : Button = findViewById(R.id.one)
        val buttonTwo : Button = findViewById(R.id.two)
        val buttonThree : Button = findViewById(R.id.three)
        val buttonFour : Button = findViewById(R.id.four)
        val buttonFive : Button = findViewById(R.id.five)
        val buttonSix : Button = findViewById(R.id.six)
        val buttonSeven : Button = findViewById(R.id.seven)
        val buttonEight : Button = findViewById(R.id.eight)
        val buttonNine : Button = findViewById(R.id.nine)

        /* 計算ボタン */
        val buttonAdd : Button = findViewById(R.id.add)
        val buttonMul : Button = findViewById(R.id.mul)
        val buttonSub : Button = findViewById(R.id.sub)
        val buttonDiv :Button = findViewById(R.id.div)

        /* 実行ボタン */
        val buttonEqual:Button = findViewById(R.id.equal)

        /* クリアボタン */
        val buttonClear : Button = findViewById(R.id.clear)

        /* 表示テキスト */
        val textArea : TextView = findViewById(R.id.display)

        /* 数字ボタンを押された時の処理をまとめた関数 */
        fun numBottunAction(num : String) {
            textArea.text = if(textArea.text.toString() != "0" && clear == false){
                textArea.text.toString() + num
            } else {
                clear = false
                num
            }
            calc = true
        }

        /* クリアボタンを押された時の処理 */
        /* 全て初期値に戻す */
        buttonClear.setOnClickListener {
            textArea.text ="0"
            value = 0
            operator = null
            clear = false
            calc = false
        }

        /* 数字ボタンを押された時の処理 */
        /* 表示領域を更新 */
        buttonZero.setOnClickListener {
            numBottunAction("0");
        }

        buttonOne.setOnClickListener {
            numBottunAction("1");
        }

        buttonTwo.setOnClickListener {
            numBottunAction("2");
        }

        buttonThree.setOnClickListener {
            numBottunAction("3");
        }

        buttonFour.setOnClickListener {
            numBottunAction("4");
        }

        buttonFive.setOnClickListener {
            numBottunAction("5");
        }

        buttonSix.setOnClickListener {
            numBottunAction("6");
        }

        buttonSeven.setOnClickListener {
            numBottunAction("7");
        }

        buttonEight.setOnClickListener {
            numBottunAction("8");
        }

        buttonNine.setOnClickListener {
            numBottunAction("9");
        }

        /* 計算の実処理を行う関数 */
        fun calculation(op : String?) :Int {
            return if (op == "+") {
                value + textArea.text.toString().toInt()
            } else if (op == "-") {
                value - textArea.text.toString().toInt()
            } else if (op == "*") {
                value * textArea.text.toString().toInt()
            } else if (op == "/") {
                value / textArea.text.toString().toInt()
            } else {
                textArea.text.toString().toInt()
            }
        }

        /* 計算ボタンを押された時の処理をまとめた関数 */
        fun calcBottunAction(op : String?) {
            /* 計算処理有効の場合のみ計算と表示の更新を行う */
            if (calc == true) {
                value = calculation(operator)
                clear = true
                calc = false
                textArea.text = value.toString()
            }
            /* 演算子は計算処理無効でも更新 */
            operator = op
        }


        /* 計算ボタンが押された時の処理 */
        buttonAdd.setOnClickListener {
            calcBottunAction("+")
        }

        buttonMul.setOnClickListener {
            calcBottunAction("*")
        }

        buttonSub.setOnClickListener {
            calcBottunAction("-")
        }

        buttonDiv.setOnClickListener {
            calcBottunAction("/")
        }

        /* "="ボタンが押された時の処理 */
        buttonEqual.setOnClickListener {
            /* 計算処理有効の場合のみ計算と表示の更新を行う */
            if (calc == true) {
                value = calculation(operator)
                calc = false
                clear = true
                textArea.text = value.toString()
                operator = null
            }
        }
    }
}
プログラム上でもコメントで書いていますが、1行目はパッケージ名によって変わりますのでコピペ時に上書きするとビルドがうまく成功しなくなります。なのでコピペする場合は2行目以降からコピーするようにしてください。
Android Studioっぽさ、Kotlinっぽさがあった部分を紹介しておきます。
・valとvarの使い分け
Kotlinでは変数宣言後に値を変更しないものはvalで変更するものはvarで変数宣言を行います。
例えば本プログラムでは計算結果はどんどん更新していくため、その値を格納するvalue変数はvarを使って変数宣言しています。一方ボタンに関しては変数宣言後は参照するだけですのでbuttonThree等はvalを使って変数宣言しています。
       /* 値を格納する変数 */
        var value : Int = 0

        /* 数字ボタン */
        val buttonThree : Button = findViewById(R.id.three)
・Nullable変数の使用
Kotlinでは基本的に変数がnullの値になることを許していません。ですので安全なプログラムが作成することが可能です。どうしてもnullを使いたい場合は下記の「String?」のように型の後に「?」をつけてやる必要があります。
        /* 演算子を記憶しておく変数 */
        /* nullの可能性あり */
        var operator : String? = null
・if文をreturn
Kotlinではif文を式として扱います。ですのでif文をそのままreturnすることが可能です。
例えば下記のif文では、opが”-“の場合は、「value – textArea.text.toString().toInt()」の計算結果が関数の戻り値としてreturnが実行されます。
        /* 計算の実処理を行う関数 */
        fun calculation(op : String?) :Int {
            return if (op == "+") {
                value + textArea.text.toString().toInt()
            } else if (op == "-") {
                value - textArea.text.toString().toInt()
            } else if (op == "*") {
                value * textArea.text.toString().toInt()
            } else if (op == "/") {
                value / textArea.text.toString().toInt()
            } else {
                textArea.text.toString().toInt()
            }
        }</pre<
プログラム実行
MainActivity.ktとactivity_main.xmlの変更が終わったら早速Runボタンで実行してみてください。
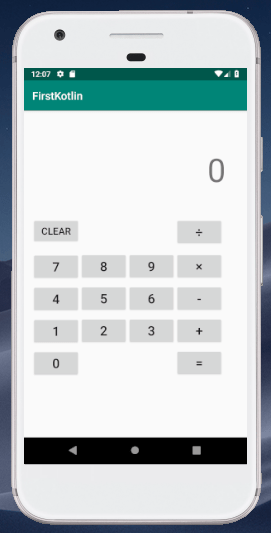
下記のような画面が現れて、通常の電卓のように計算が行えるはずです(たぶん…)。
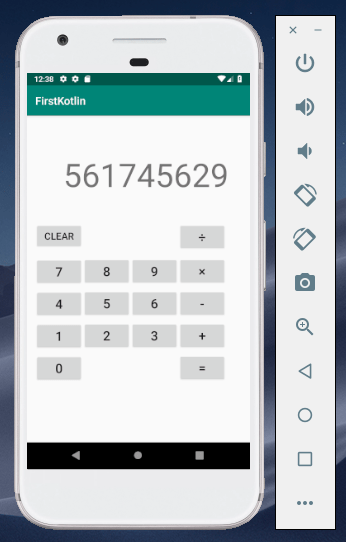
ちなみに0で割った時や数字が大きすぎる場合などのエラー処理は行っていないので実行すると落ちますw
この記事は2018/10/27時点のものになります
バージョンなどがもっと新しくなっている可能性がありますのでご注意ください
またこの記事でインストールを試した時のPCのOSは下記のとおりです
macOS Mojave バージョン10.14